tea for two birthday party

Tea for Two Birthday Party + Chocolate Chip Oatmeal Scones

This past weekend we celebrated Anna Ruth’s second birthday with a Tea for Two party. The original plan did not involve a theme, but then I saw the idea on Pinterest and knew I wanted to run with it. Being a small child’s birthday there wasn’t much emphasis on actual tea, but we made up for it with proper tea party food…mainly tea sandwiches and chocolate chip oatmeal scones, but more on the food later.

tea for two birthday partytea for two birthday party

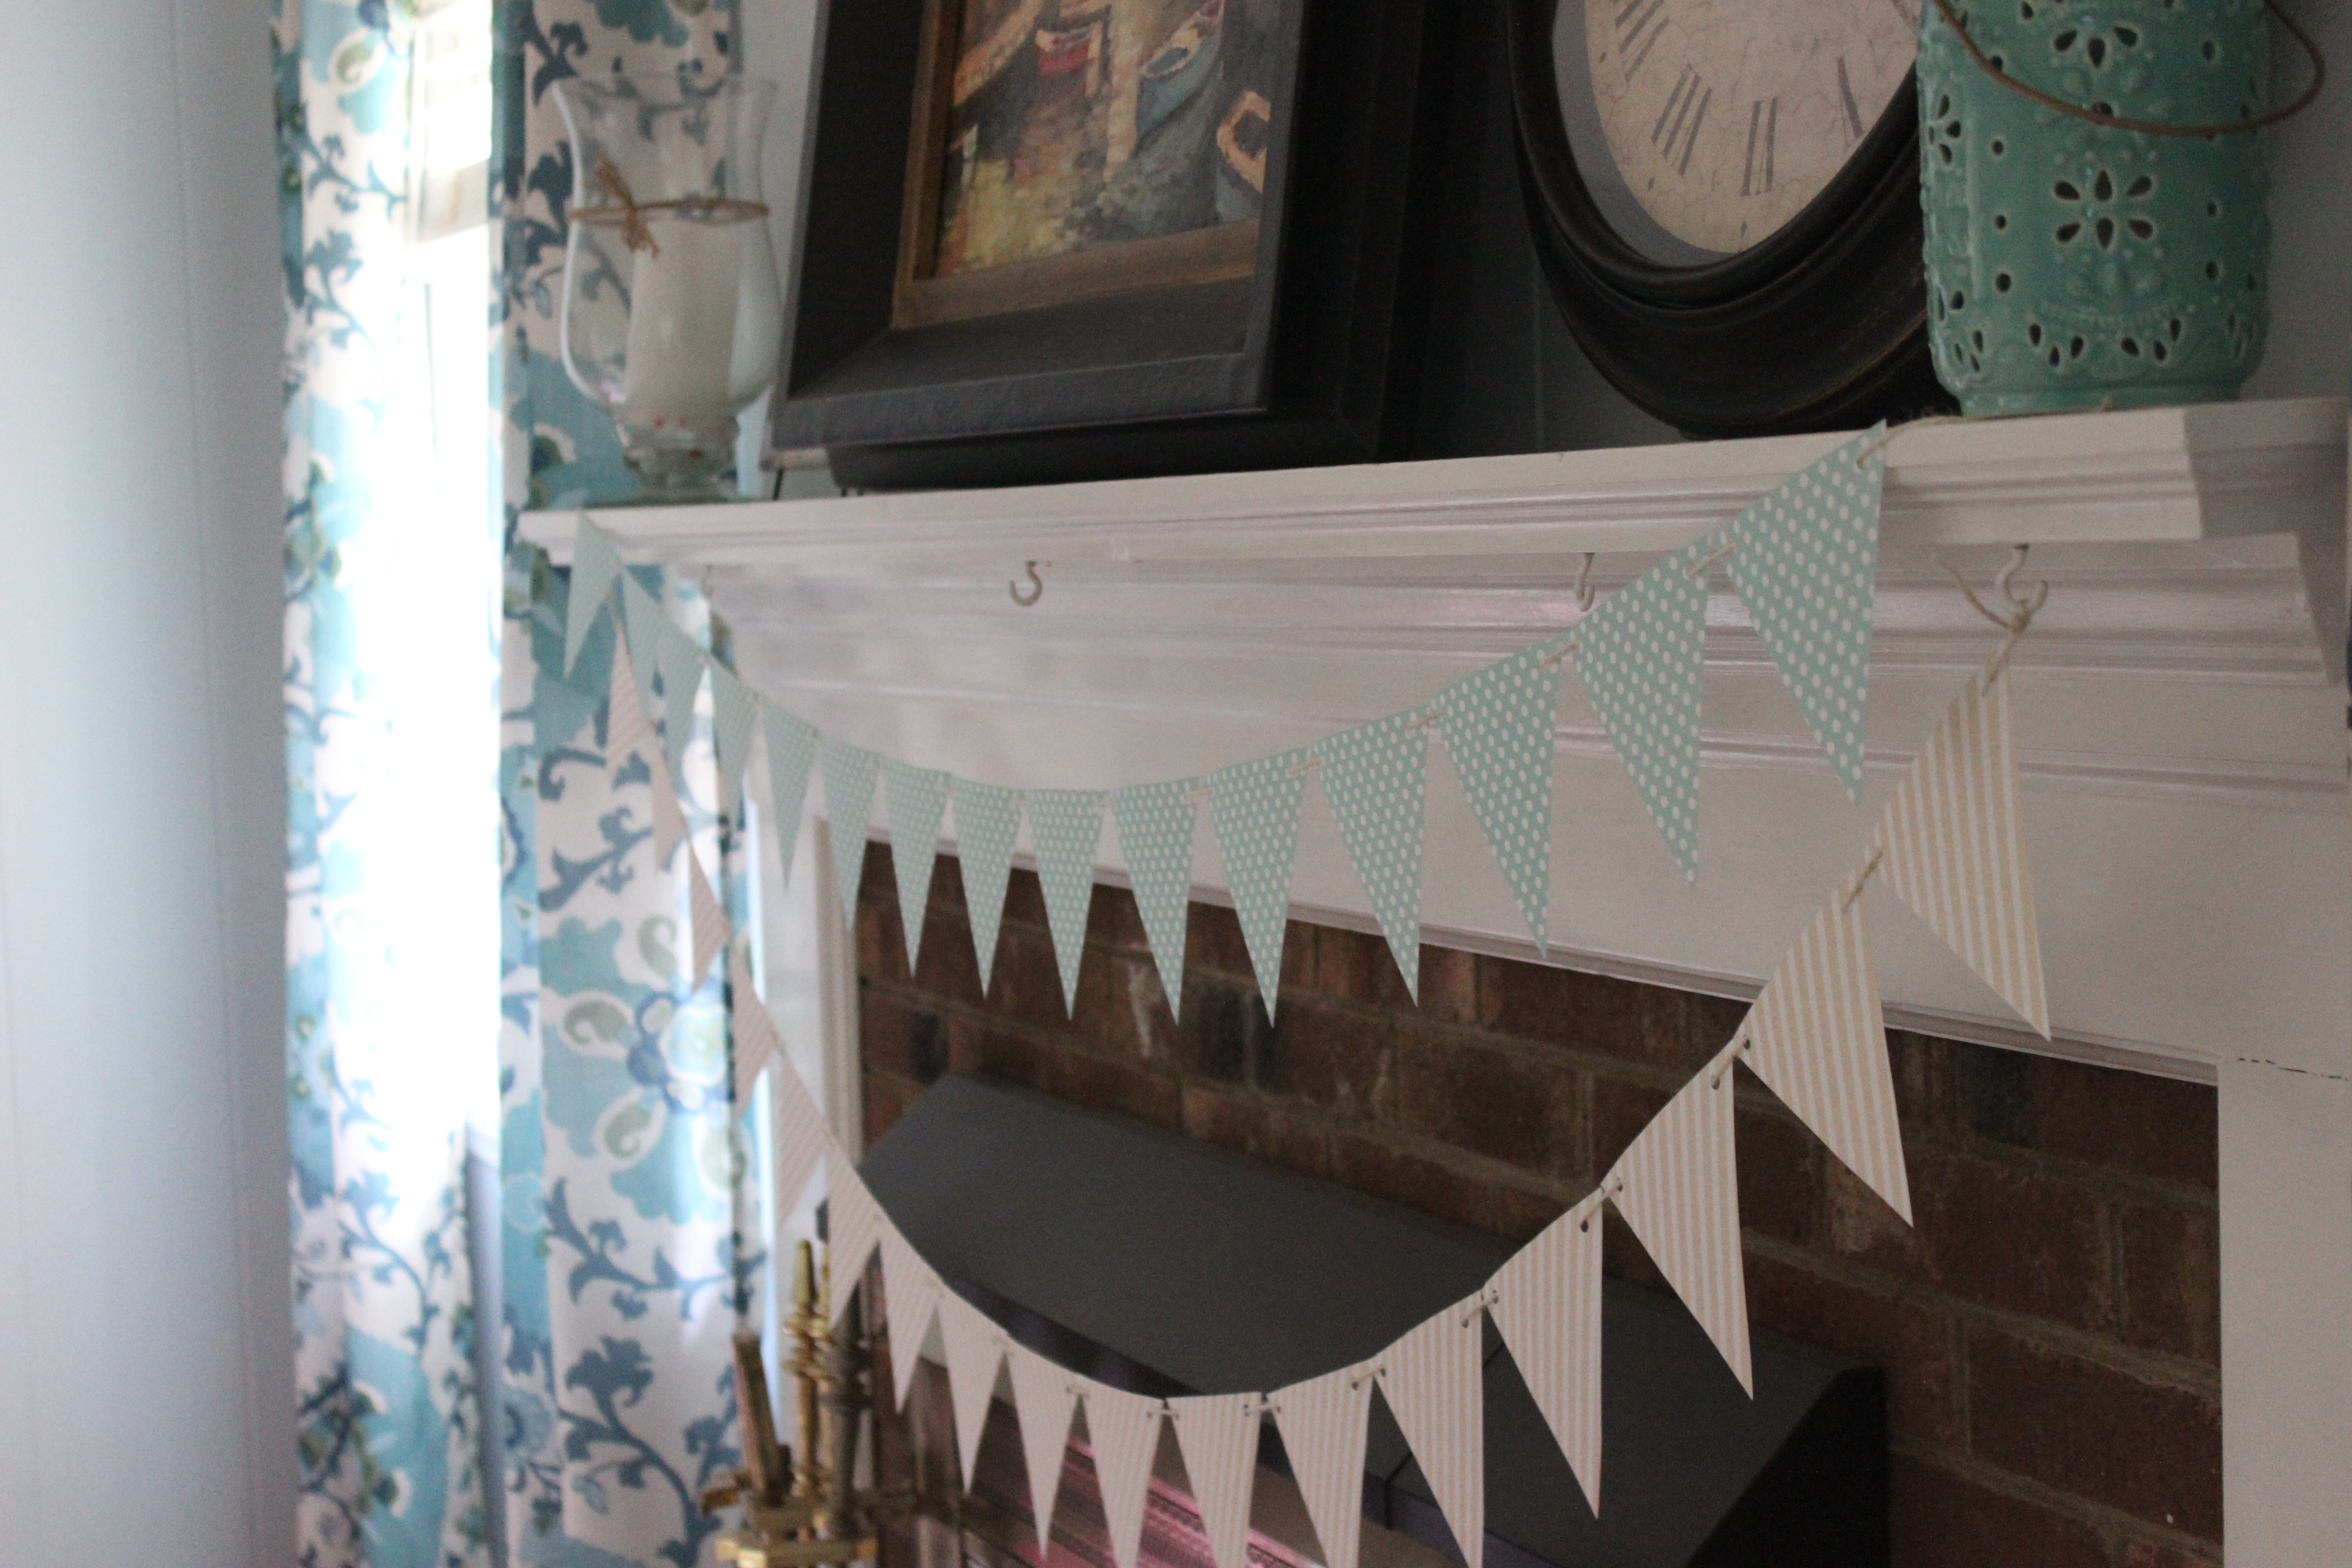
Décor was easy. We started with a few banners and garlands, and decorated the food table with white doilies and flowers in gold tea pots and cups. I found the invitations and other personalized printables on Etsy, and printed them out myself on cardstock. I’m generally not into everything being so matchy matchy, but when spread out throughout the party, it really just made it feel cohesive and not over the top. We had little children’s tables scattered in the living room for eating and coloring, and covered those with white cloth. My favorite part of the décor, however, was a window frame with painted wood letters spelling “Tea for Two.” My mother-in-law made it, and it was exactly what I had in mind. If you ever need anything crafty, call her. She loves doing it and is really good at it.

tea for two birthday partytea for two birthday party

The only “activity” we had was coloring. My friend Katie from The Blissful Willow drew these pages for me, and they were perfect! We went with a tea pot, tea cup and bow tie. Check out her website – I love the custom family illustrations, but really everything she draws is beautiful.

tea for two birthday party

Now onto the best part – the food! Our menu was as follows:

Sandwiches

Ham and Swiss on Puff Pastry
Chicken Salad on Croissant
Cucumber with Lemon Dill Spread

Savory

Crackers and Cheese (sharp cheddar, Colby jack, pepper jack)
Mini Quiche

Sweet

Berry Cups (strawberries, blueberries, raspberries)
Chocolate Chip Oatmeal Scones
Cupcakes (vanilla, chocolate)
Birthday Cake (chocolate)

Drinks

Citrus Infused Water
Sweet Iced Tea
Sweet Tea Sangria

tea for two birthday partytea for two birthday partytea for two birthday party

It seems like a lot of food, but it was just a bunch of small bite type things, and it was really easy to pull together. My favorite part, hands down, were the scones. I had never made scones before because I’m really not much of a baker. I always thought they would be really involved, but these were super easy. My friend Catherine came over two nights before the party, and we made three batches in just over an hour. The recipe below is based on an oatmeal raisin scone recipe by Nick Malgieri, but I tweaked it by adding cinnamon, vanilla and heavy cream, and swapping raisins for mini chocolate chips. (I can’t find a link to his recipe because it was from his cookbook, “How to Bake”.) Don’t get used to this. I don’t plan to do much in the way of creating recipes for baked goods. It’s too daunting to think that an extra tablespoon of an ingredient can totally throw the whole thing off. I prefer eyeballing too much for that 😉

I’ve said this about other parts of the party, but another favorite thing was the favors. I originally planned on not having favors, but then saw this cute idea on Pinterest, and I love how they turned out!

tea for two birthday party

I can’t believe my baby is already a two-year-old. The time has truly gone by in the blink of an eye…and now I need to go cry. I’ll leave you with the recipe for my Chocolate Chip Oatmeal Scones, but let me know if you have questions about anything else (food or décor).

tea for two birthday party

Ingredients:

1 ½ cup all purpose flour
1 ½ cup rolled oats
1/3 cup dark brown sugar
1 tbsp baking powder
1 tsp cinnamon
1 tsp salt
8 tbsp (1 stick) cold unsalted butter
1 cup mini chocolate chips
1/2 cup milk (I use 1%)
1/2 cup heavy cream
1 tsp vanilla extract

Directions:

  1. Preheat oven to 400 degrees, and set rack to middle position. Line a baking sheet with parchment paper.
  2. Combine dry ingredients (flour through salt) in the bowl of a food processor and pulse at 1-second intervals until combined (make sure brown sugar isn’t in big clumps).
  3. Cut the stick of butter in half lengthwise, then into smaller chunks (about 16 total). Add to the food processor and pulse 12 times, until the mixture resembles a fine meal.
  4. Combine milk, heavy cream and vanilla in a small bowl. Add mixture to the food processor and pulse 3-4 times to form a soft dough.
  5. Transfer the dough into a bowl and gently stir in the mini chocolate chips, making sure not to overwork the dough.
  6. Generously flour your work surface, turn the dough out onto it and fold over itself 3-4 times until it is less sticky.
  7. Divide the dough into two equal parts and press each into a disk. Using a pizza cutter, cut each disk into six wedges.
  8. Arrange the scones on the prepared pan. Brush tops with milk and sprinkle with sugar.
  9. Bake for 15-18 minutes until just starting to brown on top.
baby pea guacamole

Baby Pea Guacamole

Today’s post is named as is for two reasons. Reason one is for the actual ingredient I use in my guacamole. Yes, you just read that right. And I probably just lost half of you. Wait wait wait! Just hear me out. By now it’s no secret that I add veggies in anytime I see an opening, so why not with guacamole? Guacamole in and of itself is already all veggies and pretty healthy, but avocados really do make the calorie count soar. My answer? Stretch it out by adding baby PEAS –> oh yes I just did. I will admit Andy was suuuuper skeptical the first time I mentioned I would be adding peas to our guacamole, but then he ate it and couldn’t even taste them. Literally, he thought I had changed my mind about using them.

baby pea guacamole

Reason two for the name of this post is to give a nod to the fact that my own Baby Pea is turning TWO on Friday, and I. Can’t. Deal. How in the world has it already been two years??? I had no trouble when she turned one (probably because I was still in the hazy fog that is having a child under one), but for some reason I am so emotional about this next birthday. I guess it’s probably that the first year seemed so hard, and we were just grateful to get through it, but now we’re pretty comfortable with this whole parenting thing. I don’t know. They say it goes fast, and you believe them, but you don’t really, truly get it until it’s your own little nugget. If you need me on Friday, I’ll be crying in my office. How much she’s grown in the year since this picture was taken…*sobs*

Anna Ruth

For the last several years anytime we make guacamole we just use pico de gallo mixed with mashed avocados. I thought I was GENIUS, but then saw the Pioneer Woman has the same method, so I’m not alone….but that does mean that I’m totally twinsies with Ree, so yay for us and our awesome guac making ways!

baby pea guacamole

I’m half and half on the pico. Sometimes I’ll make it fresh and other times I just buy it fresh from the store. No shame. If you want convenience, definitely go for the store bought. If you have a little time, though, making it yourself gives you that awesome feeling of accomplishment because 1) it’s healthy and 2) I MADE THAT FROM SCRATCH(!!). If you haven’t made it this way in the past, please try it. I don’t use all of the pico in the guacamole, so I wind up having two dips made entirely of veggies. Ummm, yes please.

baby pea guacamole

Back to the recipe twist: baby peas! I guess you could do this by just mashing the thawed peas, but a food processor makes quick work of it. I should share now that I love love love my food processor. I rearranged most of the lower cabinets in my kitchen just to have it easily accessible. I use it ALL the time. I have a lot of kitchen gadgets, but I will say that this is one that will remain in the event that I ever fall under a major purging spell. I can’t find my exact model, but this is similar to the one I use. They can be pretty pricey, but I can’t tell you how many good things come from it, and it is something I use at least twice a week. Quick sauces, hummus, shredded brussels sprouts and cabbage, nut butters <– all things easily made in the food processor. Really, do yourself a favor and get one, then make this veggied up guacamole. You won’t be sorry.

baby pea guacamole

For the Pico:

5 vine ripe tomatoes
1 jalapeno
1 onion
1 large fistful cilantro
2 tbsp lime juice
Salt and pepper to taste

For the Guacamole:

2 avocados
1 cup pico de gallo (homemade or store bought)
1 cup frozen baby peas – thawed
1 tbsp lime juice

Directions:

  1. Prepare the pico: dice the tomatoes, onion, jalapeno and cilantro. Combine veggies in a bowl with lime juice and salt and pepper to taste. Stir to combine. Keep in the fridge until ready to use.
  2. Pulse the thawed peas in a food processor. (They won’t be smooth, but almost crumb-like.)
  3. In another bowl, mash the avocado to desired consistency. Mix in peas, pico de gallo and lime juice. Season with salt and pepper to taste.
creamy potato and white bean soup with sausage and kale

Creamy Potato and White Bean Soup with Sausage and Kale

I’m back with another mouthful of a recipe name – shocker. The only other name that came to mind that would truly make sense is Winter Bliss Soup, but I am not that obnoxious with my recipe names just yet. This Creamy Potato and White Bean Soup with Sausage and Kale feels like giving yourself a hug from the inside out, so “winter bliss” could totally be an appropriate name if that’s what you want to call it. Friends, I don’t even feel like I can give you an adequate description of how delicious this soup is, which is very sad for a food blogger. I’ve tried and just can’t come up with the words that express it well enough. Seriously, though, this might be the best soup I’ve ever made or eaten. There’s not one thing that makes it what it is. It’s everything combined that just makes it so perfect. Literally, I’ve had people taste this and offer to actually PAY me to make a batch for them. Personal-ish chef? Me? *Blushes*

creamy potato and white bean soup with sausage and kale

Something you’ll learn about me is that I’m a raging soup enthusiast. Obsessed. Literally, if I ever open a restaurant it will be called Laura’s Bisquetro and serve soup year-round, which is why I will probably never open a restaurant because I am likely the only person that still wants soup when it’s 90+ degrees outside. I love love love making soup – maybe even more than eating it, okay fiiine it’s a tie. I have several quick and easy recipes, but there’s just something about spending a little time here and there on a long, lazy Saturday that makes me so happy (probably because I have so few long, lazy Saturdays 😉 ). This soup is somewhere in between quick and easy and long and involved. It’s pretty hands on from start to finish, but really doesn’t take more than about 45 minutes. Here’s the gist: cook sausage, cook shallots and potatoes, add beans, puree, add sausage and kale. Dunzo bunzo.

creamy potato and white bean soup with sausage and kale

Now that I’ve said “dunzo bunzo” twice now, I have to explain. This is something my sweet little niece started saying a couple of years ago, and it stuck around the Peascoe house. Here is a pic of my perfect little Abigail. She just loves Anna Ruth to pieces and the feeling is mutual, which makes my heart happy happy happy. If you ever see AR holding a toy like a phone, ask her who she’s calling and she will say Abby or Jack 99% of the time. (Jack is Abigail’s brother/AR’s cousin-twin, and he’ll definitely show up later on!)

abigail mae

This creamy potato and white bean soup with sausage and kale is everything your freezing self wants needs during the winter. All with fresh, cozy ingredients. The potatoes, white beans and heavy cream puree into the creamiest, silkiest soup base ev-er. I’m generally not one that goes for heavy cream in recipes, but it just adds so much to this soup that I can’t forgo it. I don’t peel the potatoes (duh, all the nutrients, and ->LAZY GIRL<-), so the combination of that with the white beans gives it an earthy taste, which isn’t bad, but just needs to be mellowed out by a little cream IMO. Made as is this soup has a good kick of spice, so if you’re making it for kids I would suggest either leaving out the red pepper flakes and/or using a mild sausage. Side note: I’m interested in making this with turkey or chicken sausage, so let me know how it turns out if you do it first! Guess what else I love about this soup…it freezes beautifully! <– You probably knew that was coming, right? I’m so typical. I’ll admit I was a little skeptical about how the kale would handle it, but it comes out of the freezer and is 100% as good as the fresh version. Just make sure to let it thaw out completely in the fridge before reheating. Enjoy!

creamy potato and white bean soup with sausage and kale

Serves 8 (435 calories per serving)

Ingredients:
1 pound hot Italian sausage
1 tbsp butter
1 large shallot – diced
2 cloves garlic – minced
1 tsp each salt and pepper
1/2 tsp red pepper flakes (optional)
8 cups chicken broth
3 large russet potatoes – diced
2 (15.5 oz) cans cannellini beans – drained and rinsed
1/4 cup heavy cream (optional)
1/2 -1 bunch kale – stems removed and leaves rough chopped or torn

Directions:
1. In a dutch oven or large stock pot over medium heat, cook sausage until done, using a wooden spoon to crumble as it cooks. Remove from pot and set aside*.
2. In same pot melt butter and add shallot and cook until soft. Add garlic, salt, pepper and red pepper flakes (if using) and stir until fragrant – about one minute. Add broth, scrape up the browned bits on the bottom and then add the potatoes.
3. Bring mixture to a boil, then reduce heat to simmer for 30 minutes, or until potatoes are tender. During the last five minutes of cooking time, add the beans.
4. Use an immersion blender to puree the mixture until smooth. Stir in heavy cream.
5. Return the sausage to the soup, then add the kale a couple handfuls at a time. It will look like it’s too much, but kale wilts down a lot, so keep adding!
6. Serve with crusty bread (if desired) and enjoy!

*I use sausage that doesn’t render much fat, so I just leave what’s left in the pot after scooping it out. If your sausage renders a lot of fat, spoon most of it out and leave 1-2 tsp.

crockpot veggie lasagna

Crockpot Veggie Lasagna

Today I’m testing the limits of what you will or will not let me get away with putting in your face.  In my mind veggie lasagna is *muah* but for some people lasagna with no meat is like pizza with no cheese….just let me speak my piece then decide.  #1 I mean, just look at it…

crockpot veggie lasagna

#2 This veggie lasagna is a crockpot filled with soul-warming comfort food at its finest with the health factor bumped up like a hundred notches.  I will admit some of the best lasagnas include a mix of ground beef and sausage, but I would rank this as being equally good.  Unless you’re my husband (Andy, turn off the laser beams in your eyes)…he’s, ummm, a meatatarian and makes no bones about the fact that he will begrudgingly eat a meal if it does not include some sort of beef, chicken, seafood or pork.  Don’t get me wrong.  We do at least one meatless dinner a week, but when I try to slip a second one in there he preemptively gets hangry.  However, he actually liked this…like really really liked it – win!

crockpot veggie lasagna

In the winter it’s so easy to get sucked into eating heavy comfort food because it’s so cold outside, and some days you literally feel like you’ll freeze to death if you don’t eat pot roast or stew.  I generally get about half way through winter like this before realizing, wow, I’m good on the animal protein, but could really use like a TON of veggies right now.  Enter this crockpot of noodley, veggie-filled love.  We’ve got loads of kale, cubed butternut squash and mushrooms.  Really, though, any veggies you have on hand can work here.

crockpot veggie lasagna

#3 You’ll leave feeling all the feels of having traditional lasagna, but with the glow that can only be achieved by eating all the veggies…and all for just under 450 calories for an enormous portion.  I’ll be honest, if you have a meatatarian in your life, you could easily add a pound of cooked ground meat (I would use sausage here because it goes really well with kale), and just use about 1/2 – 2/3 of the veggies.

crockpot veggie lasagna

Let’s talk about preparation.  This does take a minute to put together – hello, it’s lasagna.  For me this is a weekend meal, or a dinner when I’m able to run home at lunch to put it together.  The biggest thing I need to stress about this is that once the cooking time is done, you need to let it sit, covered, for about an hour before digging in.  The extra hour of resting time really pulls everything together, and gives it the texture and hold-togetherness of lasagna.  Once you’re done and this has been sitting for a while, you’ll be able to cut pieces like you would a traditional lasagna that’s been sitting, so you can go ahead and portion this out for your lunches for the week.  I’ve never tried freezing this, but I don’t see why it wouldn’t work.  If you do freeze it, let me know how it works out!

crockpot veggie lasagna

Serves 8-10 (447 calories per serving when divided into 8 portions or 358 calories for 10 portions)

Ingredients:

2 (24 oz) jars marinara sauce (you’ll only use about 1.5 jars)
12 lasagna noodles (not the no boil kind)
24 oz part-skim ricotta cheese
2 cups shredded mozzarella cheese
3-4 cups chopped kale (packed)
3 cups cubed butternut squash
8 oz sliced mushrooms
Optional: garlic powder, oregano and black pepper (or any spice combination you prefer)

Directions:

  1. Spray the crockpot with nonstick cooking spray, then add 1/2 cup of marinara sauce to the bottom.
  2. Add 3 lasagna noodles to form a single layer, breaking the noodles to fit as needed.
  3. Cover noodles with about a third of the ricotta then a third of each of the veggies.
  4. Cover the veggies with 1/2 – 1 cup of marinara (depending on how saucy you like it), 1/2 cup of mozzarella and spices*.
  5. Repeat steps 2-4 two more times then finish with one last layer of noodles, sauce and remaining 1/2 cup of shredded cheese on top.
  6. Cook on high for 3 hours or low for 5-6 hours. Once the cooking time is through, turn off the crockpot, leave the lid on and let it sit for an hour.  This step is really important because it gives everything a chance to firm up a bit.  It’ll be pretty runny if you don’t do this, which may or may not be an issue for you.

*Add any spices you like.  I do garlic powder, oregano and black pepper.  I don’t measure it, but I would say less than a 1/4 teaspoon of each per layer.  Depending on the marinara sauce you may want to add a little salt as well, but mine already had plenty.

mango curry yogurt sauce

Mango Curry Yogurt Sauce

Surprise!  I know it’s not Wednesday, and I promised I wouldn’t bother you more than once a week, but a bonus recipe every now and then never hurt anybody.  It’s the weekend so I’ll get straight to the point.  You NEED this Mango Curry Yogurt Sauce in your life for all the things…raw or roasted veggies, sandwiches, chicken, pork, seafood, fondue.  This is a take on the Melting Pot version, but better because you can have it at home without having to go out for a $150 dinner.

mango curry yogurt sauce

My recent obsession has been roasted cauliflower, but – Y’ALL – we did fondue at home for V-Day and let me just tell you (leans forward) cauliflower dipped in tempura batter, fried and dipped in mango curry yogurt sauce is mind blowing, out of this world good.  Another fondue thing that is mind blowing, out of this world good?  Button mushrooms dipped in tempura batter, fried, stuffed with Alouette Garlic and Herbs then dipped in mango curry yogurt sauce.  Another fondue thing that is mind blowing, out of this world good?  Shrimp peeled with the tails left on, dipped in tempura batter, fried and dipped in mango curry yogurt sauce.  I am 500% certain I ate the amount of food I did on V-Day because of this sauce.  It really is that good.

mango curry yogurt sauce

Most recipes of this call for equal parts yogurt and mayonnaise – gross.  I opt for 3 parts Greek yogurt to 1 part mayo.  I also use hot mango chutney rather than Major Grey’s.  And while I’m normally team fresh squeezed lime juice, bottled is just fine for this.  It’s easy peasy and the perfect condiment to give your sauce game a leg-up.  Enjoy!

mango curry yogurt sauce

Ingredients:

3/4 cup plain Greek yogurt
1/4 cup mayonnaise
1/2 cup mango chutney (I use hot)
1 tbsp minced red onion
2 tsp curry powder
1 tsp lime juice
Sprinkle of cayenne pepper (to taste)

Directions:

Stir all ingredients together in a bowl until well combined.  Cover and let chill in the fridge for 2 hours before serving.  Use within five days.

sriracha honey lime chicken thighs

Sriracha Honey Lime Chicken Thighs

I’m taking a break from my obnoxious veggie prep obsession to bring you my current sweet, spicy, tangy, chickenny kind of obsession…don’t you worry, I’ll be back next week with an in your face veggie lasagna, but for now let’s just adore these Sriracha Honey Lime Chicken Thighs together, mmkay?

sriracha honey lime chicken thighs

I love when I can make a bunch of something and freeze the leftovers for later on.  I mean, don’t we all love that?  Well these Sriracha Honey Lime Chicken Thighs are just what we need.  A couple weekends ago we had a break from the dreary winter cold, so what did Andy want to do? -> Grill.  Always grill.  And while we’re firing up the grill, why not use the opportunity (aka: cooking space) to make extras?  I love this recipe so much because it is so super easy (hiiiii, 4 ingredients!) and completely adjustable for what you want.  Want to only make enough for dinner?  Fine.  Want to go boneless, skinless?  Okay (weirdo).  Want to bake in the oven rather than grill?  Absolutely!  Want to make these using chicken wings?  Yes, and you’ll officially be my hero.  You just take the basic recipe, and tweak it to fit your needs.

sriracha honey lime chicken thighssriracha honey lime chicken thighs

My need, however, is having as many of these babies grilled, cooled and frozen as I can for easy weeknight meals for the rest of the winter.  I’ll freeze them in packs of four – two for Andy’s dinner, one for my dinner and one for Andy’s lunch the next day.  Full disclosure: these are better when you eat them fresh just after grilling (or baking).  They’re still really good after being frozen, but just not aaaaas good.  Still, for me and my life right now, I’m willing to sacrifice a little fresh cookedness for the easy meal it gives me.  Here is my favorite kind of weeknight: get home from a late afternoon playdate, throw some broccoli florets in the oven to roast, heat up a package of organic, pre-cooked rice (buy this brand at Costco for $8) and reheat these delicious sriracha honey lime chicken thighs.  Dinner is done in less than 30 minutes with maybe 5 minutes of actual hands on time.  Easy peasy!

Random side note – this blog was thiiiiis close to being named “Easy Peasy”– get it? Peascoe -> Peasy?  I thought it’d be a fun way to use our name and give an idea of what types of recipes you’d find here.  Anyways, I’m really glad I came up with something else because sometimes a girl just wants to make long, involved recipes, and then blog about it.  Amiright?  Second random side note – you’ll also notice a yellow sauce in the pic below…you guys, this curry yogurt sauce has been my LIFE for the last couple of weeks.  If I can get it together, then I’ll do a mid-week post to share it.  Moving on…

sriracha honey lime chicken thighs

Friends, if you like spicy things, you’re likely to love this.  It is so super simple and incredibly delicious.  First, you get the zing from the lime juice, followed by a hint of sweetness from the honey and then you finish with a one-two punch of heat from the sriracha.  The last thing you do is add a little torn cilantro on top, which is optional, but not really optional if you know what I mean.   The recipe below is the basic, but I generally double or even triple it depending on how much freezer space I have at the time.  Enjoy!

sriracha honey lime chicken thighs

Ingredients:

8 bone-in, skin-on chicken thighs
4 tbsp honey
6 tbsp sriracha
Juice of one lime
Cilantro for garnish

Directions:

  1. In a bowl whisk together the honey and sriracha.
  2. Place chicken thighs in a zipper plastic bag and add the marinade.
  3. Marinate at least two hours and up to overnight.
  4. Heat the grill to medium then start with the skin side down.
  5. Pour the leftover marinade into a small sauce pot, add the lime juice and bring to a boil.  Allow to simmer 5-10 minutes to thicken.
  6. Continue to cook the chicken over medium heat, flipping and basting with the marinade 3-4 times.
  7. Once the chicken is cooked through, remove it from the grill, top with cilantro and enjoy!
roasted butternut squash and red bell pepper sauce

Roasted Butternut Squash and Red Bell Pepper Sauce

Sorry, I can’t talk.  I can’t stop stuffing my face with anything butternut squashy.  As promised last week I said I would give you my go-to roasted butternut squash recipe this week.  Well you’re getting that, PLUS a recipe I’ve been crushing on for a while that uses half of it… Roasted Butternut Squash and Red Bell Pepper Sauce.  Forgive me.  I’ve tried coming up with something better than <- THAT mouthful of a name, but nothing seems right.  Please don’t be scared away by such a long name.  If anything just remember that roasting = hands off, so yay for easy!

roasted butternut squash

As you may have realized last week, I’m obsessed with roasting veggies.  Roasted veggies are just better than pretty much any other means of preparation IMO.  Okay, sautéed is also great, but mainly for stir fries.  I just can’t get past the mushiness that comes from boiling and steaming – bleh, so roasting it is!  My favorite right now is roasted butternut squash.  My grocery store sells 2 lb containers of it peeled, seeded and diced, which makes my life 1,000x easier (read: the amount of time I save by not peeling/seeding/dicing is worth the extra $.20/lb I would save buying it whole).  Almost every Sunday I roast the entire 2 lbs and use it throughout the week.  We’ll throw it into frittatas, have it by itself as a side or use it in a burrito for a meatless night during the week.  There are so many other things I do, and you’ll be getting some of those ideas later on.  Lately, though, I’ve been using half of it right away for this sauce.  Y’all, this sauce is ALL veggies with a little olive oil and seasoning thrown in.

roasted bell pepper sauce

Let me count the ways I love this sauce:

  1. Everything roasts in the oven at the same time – you only need to give yourself about 5-10 minutes of prep, and then go relax while the oven does its roasting magic.
  2. Once roasted and cooled, you throw everything into a food processor or blender and give it a whir, and that’s it – dunzo bunzo.
  3. Very little clean-up! Roast the veggies on parchment paper, so you only have the food processor to clean.
  4. I said it before, and I’ll say it again – ALL VEGGIES…healthy…healthy glow…goddess glow…you get it.
  5. It is SO versatile. It should be obvious by now, but I love lists, so here are the ways I’ve already used it:
    • As a dip for raw veggies (or nuggets for kids – just mix with a little ketchup)
    • As a spread for sandwiches and wraps (esp on grilled cheese)
    • Thin it out with a little cooking liquid and use it as a pasta sauce
    • Roasted Butternut Squash and Red Bell Pepper Hummus (recipe coming later)
    • I haven’t tried this yet, but it just came to me and now I’m super excited…use as pizza sauce
  6. It freezes really well, though we generally don’t have any trouble finishing it during the week.
  7. The entire batch has just over 850 calories – 861 to be exact. It’s hard to give calories per serving because the number of servings will vary depending on how you use it.
  8. It’s gluten free and vegan.

I’ll stop, so you can decide for yourself.  Seriously, you need to get this into your life right now – you can thank me later.

roasted butternut squash and red bell pepper sauce

Ingredients:

2 lbs diced butternut squash*
1 tsp Italian Seasoning
3 red bell peppers halved and seeded
2 small shallots
1 cup cherry tomatoes
3-4 tbsp olive oil for roasting the veggies
2 tbsp olive oil for the sauce
1/4 tsp salt (or more to taste)
1/8 tsp pepper

Directions:

  1. Preheat oven to 400 degrees
  2. Prepare veggies for roasting: (Start with the shallots because they need more roasting time.)
    • Peel shallots, drizzle with a little olive oil and wrap in aluminum foil. Place foil pack in oven (make sure to position it so oil doesn’t drip out and down).
    • Toss** butternut squash with 2 tablespoons of olive oil and 1 teaspoon Italian seasoning. Spread onto a rimmed cookie sheet lined with parchment paper.  Sprinkle with salt and pepper to taste.
    • Place bell pepper halves skin side up on another lined baking sheet.
    • Toss** tomatoes with a little olive oil and put on baking sheet with peppers. Sprinkle with salt and pepper.
    • Once the shallots have been roasting for about 15-20 minutes, add the squash to the oven. After 20 more minutes, stir the squash and add the peppers and tomatoes to the oven.  Allow everything to roast for another 30 minutes or until soft.
  3. Place bell peppers in a bowl and cover with plastic wrap. Allow all of the veggies to cool.  Once cooled, peel the skin from the peppers, and place all of the veggies in a food processor or blender (remember to only add half of the butternut squash).
  4. To the food processor add olive oil, salt and pepper (feel free to add some red pepper flakes if you want this spicy). Turn it on, and let everything come together as a thick sauce.
  5. Keep in the fridge for up to a week or freeze for up to 3 months.

*I recommend roasting the entire amount, so you’ll have half ready for other uses during the week.

**Tip: Use a gallon-size zipper bag to toss the veggies with the oil because it saves having to clean a big bowl, and I’ve found it’s the best way to evenly coat the ingredients.  Use the same bag for both the squash and tomatoes.

weekly veggie prep

Weekly Veggie Prep and Roasted Cauliflower

I introduced this blog with the idea that Andy and I do a fair amount of food prep on the weekends, so I figure I need to actually dedicate entire posts every so often to show you what I mean by that.  The previous recipes on the blog don’t show just how “into” veggies I am, but I reallllly am.  As a rough estimate I can confidently say that most days we both get at least 6 servings of veggies and 4 servings of fruit, and that is possible because we prep.  I’ll start with our basic veggie prep and roasted cauliflower that we do almost every weekend – and I’ll try to keep myself from getting too wordy.

weekly veggie prep

First thing I should clarify is that we do this on Sunday’s during Anna Ruth’s naptime.  I know a lot of people don’t have a guaranteed time they have to be home, so I’m lucky that I can make this a priority. You may not have an hour on the weekends where you can, or even want to, prep, but even 10-15 minutes can make a huge difference during the week.

One thing I always always always do is chop fresh veggies for Andy and me to eat for lunches or snacks during the week.  We prepare ten sandwich baggies of veggies that we eat each day.  Groundbreaking, I know…  I actually started doing this when I was pregnant with AR and had to force myself to eat veggies, and it stuck.  These bags usually include red bell pepper strips (5 peppers total), cucumber slices (2 English cucumbers total) and grape tomatoes (8-10 per bag), and I’ll add celery and carrots to Andy’s bags if we have it.  I’ll also make a separate bag for AR with just bell pepper strips and cucumber slices that she can snack on while I’m making dinner in the evenings.  We’ve got the whole process of rinsing, chopping and bagging down to about 10 minutes, which is time well spent in my book.  You guys, this automatically ensures you’re eating about 2 cups of whole, raw veggies every day without giving it much more thought.  <– Winning

weekly veggie prep

The other two things I make almost every week are roasted cauliflower and butternut squash.  I roast them on Sunday and use them up throughout the week.  Next week’s post will include my roasted butternut squash go-to, so I’ll spend some time on cauliflower now.  Pic of pre- roasted cauliflower covered in curry powder and turmeric in yo face…

roasted cauliflower

Cauliflower is loaded with nutrients, and has even been linked to cancer prevention (yay, health!).  I love it roasted because it takes on an almost nutty flavor.  Toss it with some curry powder and turmeric (spices shown to improve brain health), throw it in the oven then give yourself a nice hug for taking such good care of you.  Really, roasted cauliflower is great for so many things….

  1. As a side
  2. Added into stir-fry
  3. As a salad topping (surprisingly good)
  4. Added into pasta
  5. Paired with butternut squash, sautéed spinach and an egg for a glorious breakfast bowl
  6. Paired with baked falafel, butternut squash and avocado in a pita pocket

The list could go on.

I generally don’t even add it into our dinner plans for a specific night because I just throw it in whenever I feel like it, and we never end the week with leftovers.  It’s especially nice to have when I’m getting Andy’s lunches ready.  I usually try to make enough at dinner to send him lunch the next day, but some nights we don’t have quite enough left, so I’ll just add in roasted cauliflower – DONE.

Well, it seems I lied about not giving too many words…I’ll leave you now with my go-to roasted cauliflower recipe.  I’d love to hear what you, my lovely readers, do to prepare for the week.  I’m always looking for ways to eat healthier and easier!

roasted cauliflower

Ingredients:

1 head cauliflower
1 tbsp olive oil
1/2 tsp curry powder
1/2 tsp turmeric
Salt and pepper to taste

Directions:

  1. Preheat oven to 400 degrees.
  2. Chop the cauliflower into florets, rinse and drain well (dry as much as you can).
  3. Put cauliflower into a gallon-size zipper bag and add oil and spices. Zip bag closed and shake, making sure the ingredients distribute evenly.
  4. Pour cauliflower onto baking sheet* and roast for 30 minutes. Stir and cook an additional 10-15 minutes if you want them to brown a little more.
  5. Eat as is, or store in the fridge for up to a week and use in any of the ways discussed above.

*I line my baking sheet with parchment paper or aluminum foil with cooking spray – clean-up is done!

chicken philly cheese dip

Chicken Philly Cheese Dip

In case you haven’t heard – the Panthers are going to the Super Bowl!!!!!  The last time this happened I was just a wee college freshman watching it in a dorm room with friends.  We’ve been waiting a long time for this.

chicken philly cheese dip

It’s not just that we’re going to the Super Bowl.  The entire season gave us weekly cardiaCAT arrests ( <—bleh – WHY DO YOU LET ME SAY THINGS LIKE THIS???). However, Sunday’s game was almost magical.  At one point I thought Andy was rewinding the game to rewatch an interception, but – NOPE – it was just another interception, thank you!

–>DAB<–

I swear I think he may have had tears in his eyes by the end of the game…and I…I just had a huge grin plastered across my face the entire time.  I mean – how can you watch Cam and not just smile??  He is so fun.  Sunday was also a great day because…

  1. We were still snowed in, so lots of family time and snuggles
  2. Carolina beat Virginia Tech in men’s basketball (Go Heels!)
  3. This Chicken Philly Cheese Dip ↓

chicken philly cheese dip

Andy took his first bite of this and did his quiet chuckle, followed by “wow.”  If you’re someone that loves food, I’m sure you can relate when you know something is probably going to be good, but then is actually much better than you even expected.  Close your eyes….now imagine the scent of baked chickenny, peppery, onionny, cheesy goodness wafting through the air.  Now…dip a piece of soft, yet crunchy, baguette into said goodness, then taste……. I know, right?!?

One thing you should know about me is that I generally don’t do much in the way of dippy-type appetizers.  Usually, I’ll just put out blocks of gouda and brie with some crackers and apple slices and call it a day.  If not cheese, I’ll do little one-bite type things, but almost never a dip.  I just don’t prefer making something so heavy when dinner is the star.  The Super Bowl is an exception to that.  If there was ever a day meant for purely snacking – this is it.  Meatballs, chicken wings, pigs in blankets and dips….all the dips.  I’m not gonna lie.  I’ll even go for the processed cheese block dip.  It’s fine for just one day, right?

chicken philly cheese dip

This year I’m taking my dip making game up a notch, which (let’s be honest) is like from zero to one.  I love this dip because it allows me to use two of my favorite kitchen things: my cast iron skillet and my stand mixer.  You’ll see the iron skillet come across this blog quite a bit, but the stand mixer not so much because I don’t bake very often.  But you guys (((YOU GUYS!!))) my stand mixer is seriously the most beautiful thing in my kitchen.  It’s the Martha Stewart Blue that was only available at Macy’s a few years ago, and it was a gift from my now mother-in-law while Andy and I were still dating.  I’m pretty sure she knew I’d stick around, but figured it would seal the deal.  She was right!  Just kidding, I’m not that vain, but it really did mean a lot because she knows how much I love the color.  The picture makes it look similar to the Ice Blue color that’s still available, but it’s really much closer to a Tiffany blue.  It has a permanent place in the corner of my kitchen (not as pictured), so we can see each other anytime we want.  (Insert all the googly heart eyes.)

chicken philly cheese dip

If you don’t have a stand mixer, no problem – just mix this by hand.  You could try a hand mixer, but I just don’t think it would work as well.  One other thing you’ll learn about me from this post……………………… I sometimes use canned chicken……… *Buries face in pillow.*   Actually, no.  I’m gonna own this.  Y’all, in a pinch, canned chicken works well for stir-fries, casseroles and dips (and many other things, I’m sure).  I actually prefer it for dips like this because why in the WORLD would I take time to boil or bake my own chicken just to smother it in cheese?  And… (listen closely because you will never hear me say this again) –> I wouldn’t even substitute rotisserie chicken here.  Just make this as is, and take it to your Super Bowl party with some fresh sliced baguette.  And for all you people without kids that go to bed at 7:30, have fun at your parties!  We’ll be at home watching with AR because she is totally obsessed with football and an early bedtime.  If you happen to make this dip, can you just come over to our house and watch??  You bring the dip, and I’ll have plenty of gouda and wings!

chicken philly cheese dip

Ingredients:

1 tbsp olive oil
1 large onion – diced*
1 green bell pepper – diced*
1 tbsp Montreal steak seasoning
8 oz block cream cheese – room temp
1 cup shredded mozzarella cheese (plus more for topping)
2 (10 oz) cans chicken breast
Garnish: chopped jalapenos from a jar (if desired)

Directions:

  1. Preheat oven to 350 degrees.
  2. Heat the oil over medium-high in an iron skillet (or other frying pan if using a different baking dish). Add the onion and bell pepper, and cook until softened, about 5-7 minutes.  Stir in steak seasoning.
  3. In the bowl of a stand mixer, combine cream cheese, mozzarella, chicken, onions and peppers using the paddle attachment. (You don’t have to use a stand mixer for this, but it does make it much easier – I would not recommend using a hand mixer – just use your arm muscles 😉 )
  4. Spread mixture back into iron skillet (or other baking dish), and top with additional shredded mozzarella and chopped jalapenos if desired.
  5. Bake for 30 minutes until hot and bubbly.  Serve hot with baguette slices and additional jalapenos.

*You could easily double the veggies in this.  I only had one of each on hand when I made it, but they cook down so much between the sauteing and baking that it would be fine.  If you do that, I would add an additional 1-2 tsp of the steak seasoning.

Quick and Easy Snow Cream

I’m not planning on posting more than once a week (for now), but there’s SNOW on the ground, so I’m making an exception. Remember, my blog = my rules 🙂

Fact: I hate being cold, but I LOVE a good Winter snow. There’s also something about the threat of a major snowstorm that makes people go crazy at the grocery store. Seriously, I bought so much food we probably don’t need to grocery shop again until Spring. And it’s not just bread and milk, I tend to get things I almost never buy. *Walking down the baking aisle* “oh, muffin mix! What if we’re snowed in for forever and want muffins??” In the cart it went. I’m not against muffins. We just rarely make them because we’re more savory breakfast food people. But the thought that we *might* want muffins and can’t run out to get them was just more than I could handle. The same thing happened on just about every aisle, and I left the store sobbing just thinking about how much money I spent.

There’s just something about a snow day that makes the entire season of trying not to freeze to death worth it. Playing outside, checking in on your work from home, watching an almost two-year-old see Frozen for the first time (don’t worry, not the whole movie, so please no comments about no screen time before 2), eating soul warming stew…and of course – snow cream! Most people have their go-to way of making this, so here’s mine!

snow cream

Ingredients:
8 cups snow (more or less)
1 (14 oz) can sweetened condensed milk*
1 tsp vanilla extract

Directions:
1. Whisk milk and vanilla together, then put in freezer while you scoop your snow.
2. Add the snow gradually until you have your desired consistency.
3. Enjoy immediately and store leftovers in the freezer.

*If you don’t have sweetened condensed milk, sub 1.5 cups milk and add 1/4-1/2 cup sugar depending on how sweet you want it.

Easy peasy! I’ll be back next Wednesday with a real recipe, so please come back then!

Copyright © 2016 Miss Foodie Two Shoes, All rights reserved.